


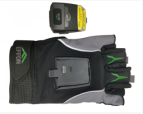
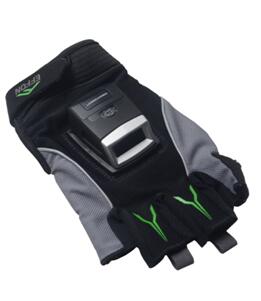
1. Microfiber glove
2. Finger trigger glove
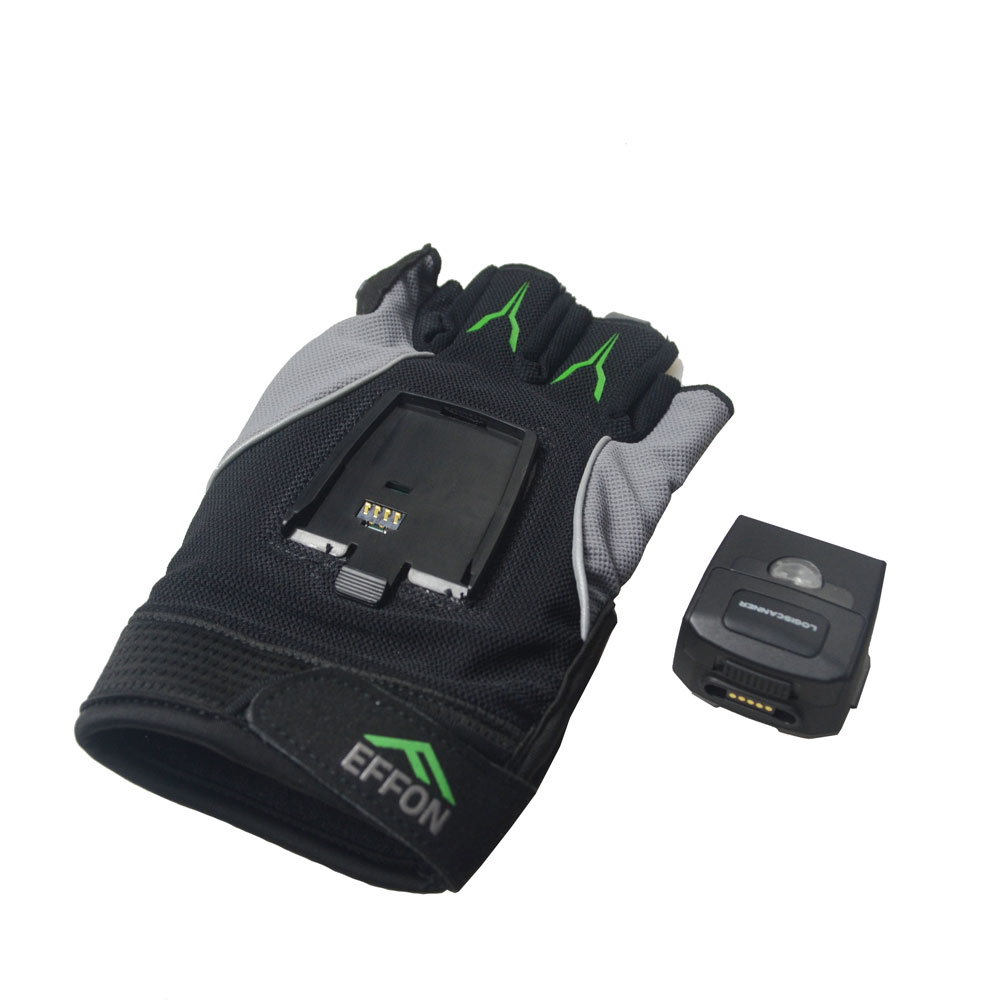
3. Optional parts for Effon Ring scanner
4. Used for warehouse or logistic application ect
5. The ring barcode reader scanner gloves is easy to install and disassemble
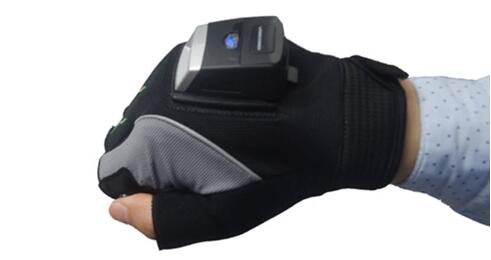
Wearable Ring Barcode Reader Scanner Gloves which can be used with our NS02 ring scanner:
The wearable Ring Barcode Reader Scanner Gloves can be used together with NS02 2D mini barcode scanners to form wearable glove scanner series. The combination provides a professional solution of barcode scanning with hands-free, which can be used for quick article tracking and identifying in picking and sorting operation in warehouse, logistics, manufacturing production line and field service, etc., offering a quick and simple way to improve working efficiency. In practice the glove scanner is used by combining it with a data terminal (mobile phone, tablet, or a stationary PC with iOS, Android or Windows OS). The communication is made via Bluetooth HID, SPP and BLE mode.
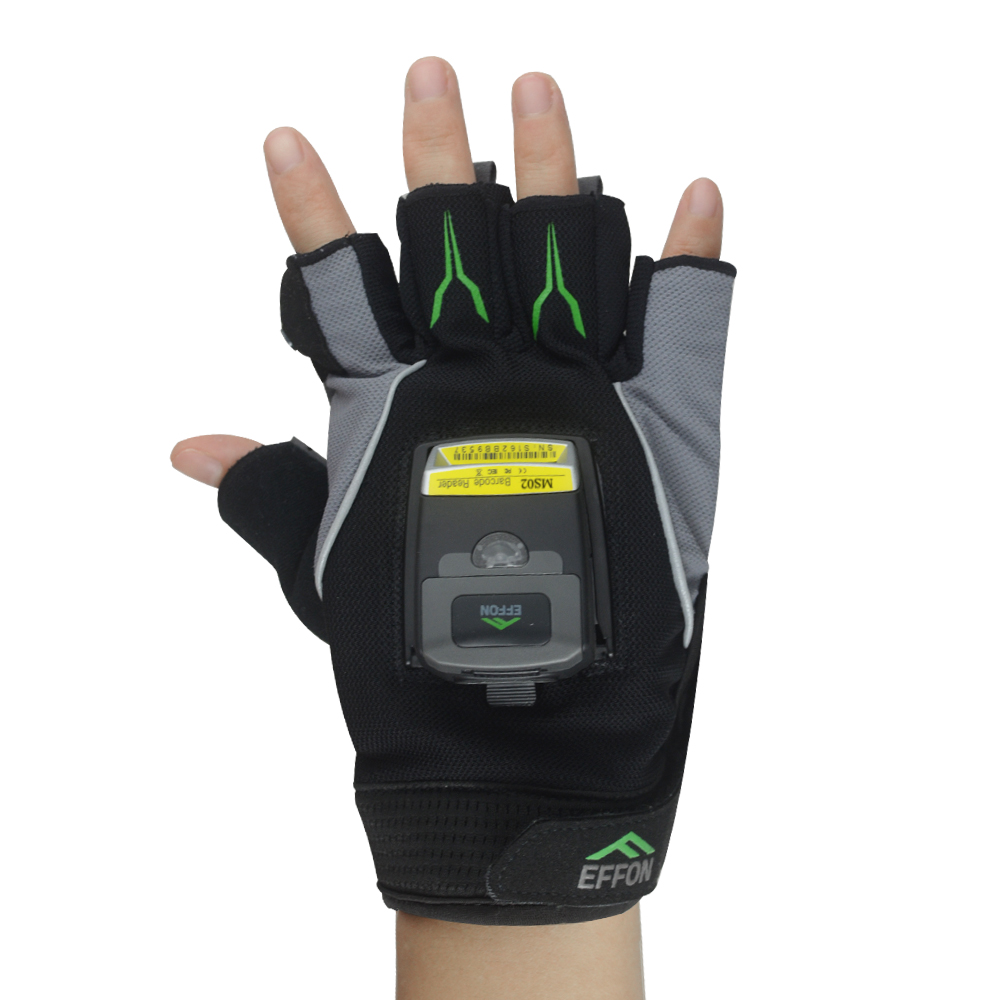

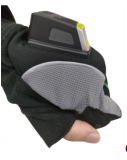
How to insert the NS02 into the glove and used together?
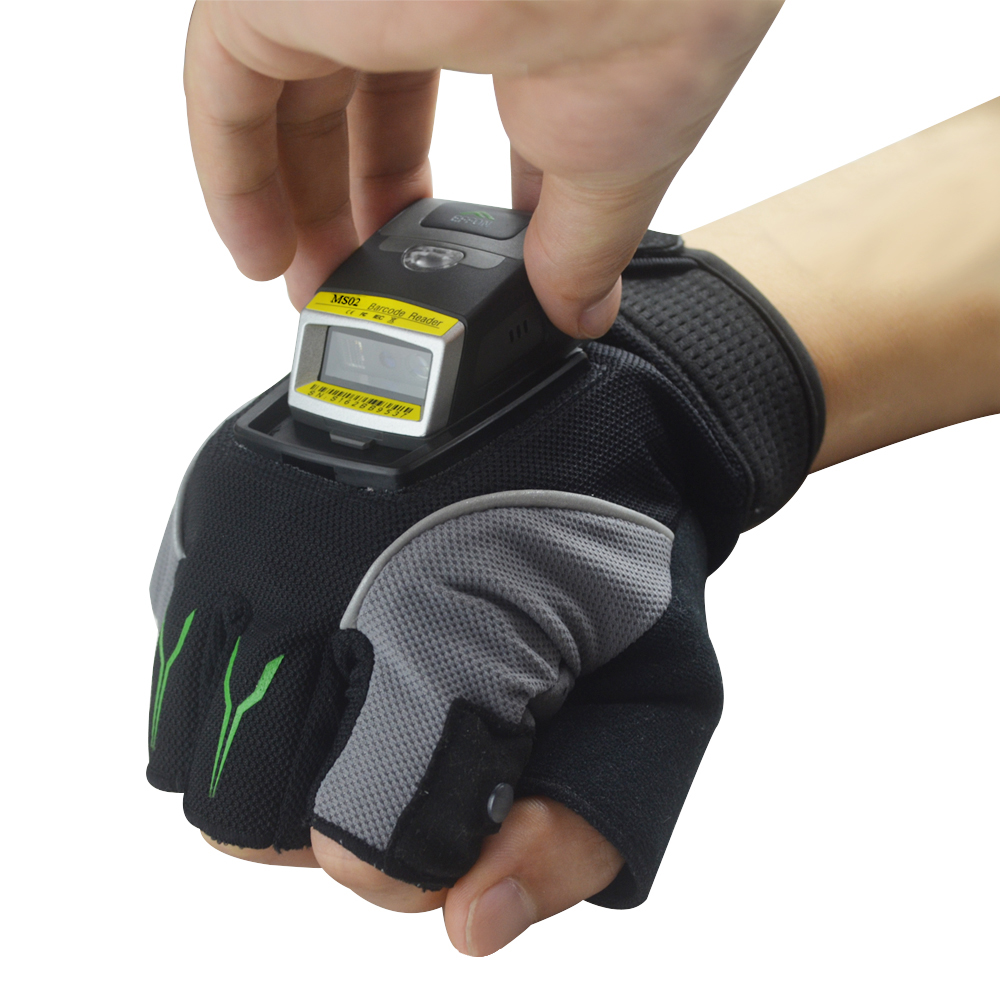
A. Insert NS02 to the holder on the back side of glove along the track, with the scan engine facing to front, and the battery room facing to above;
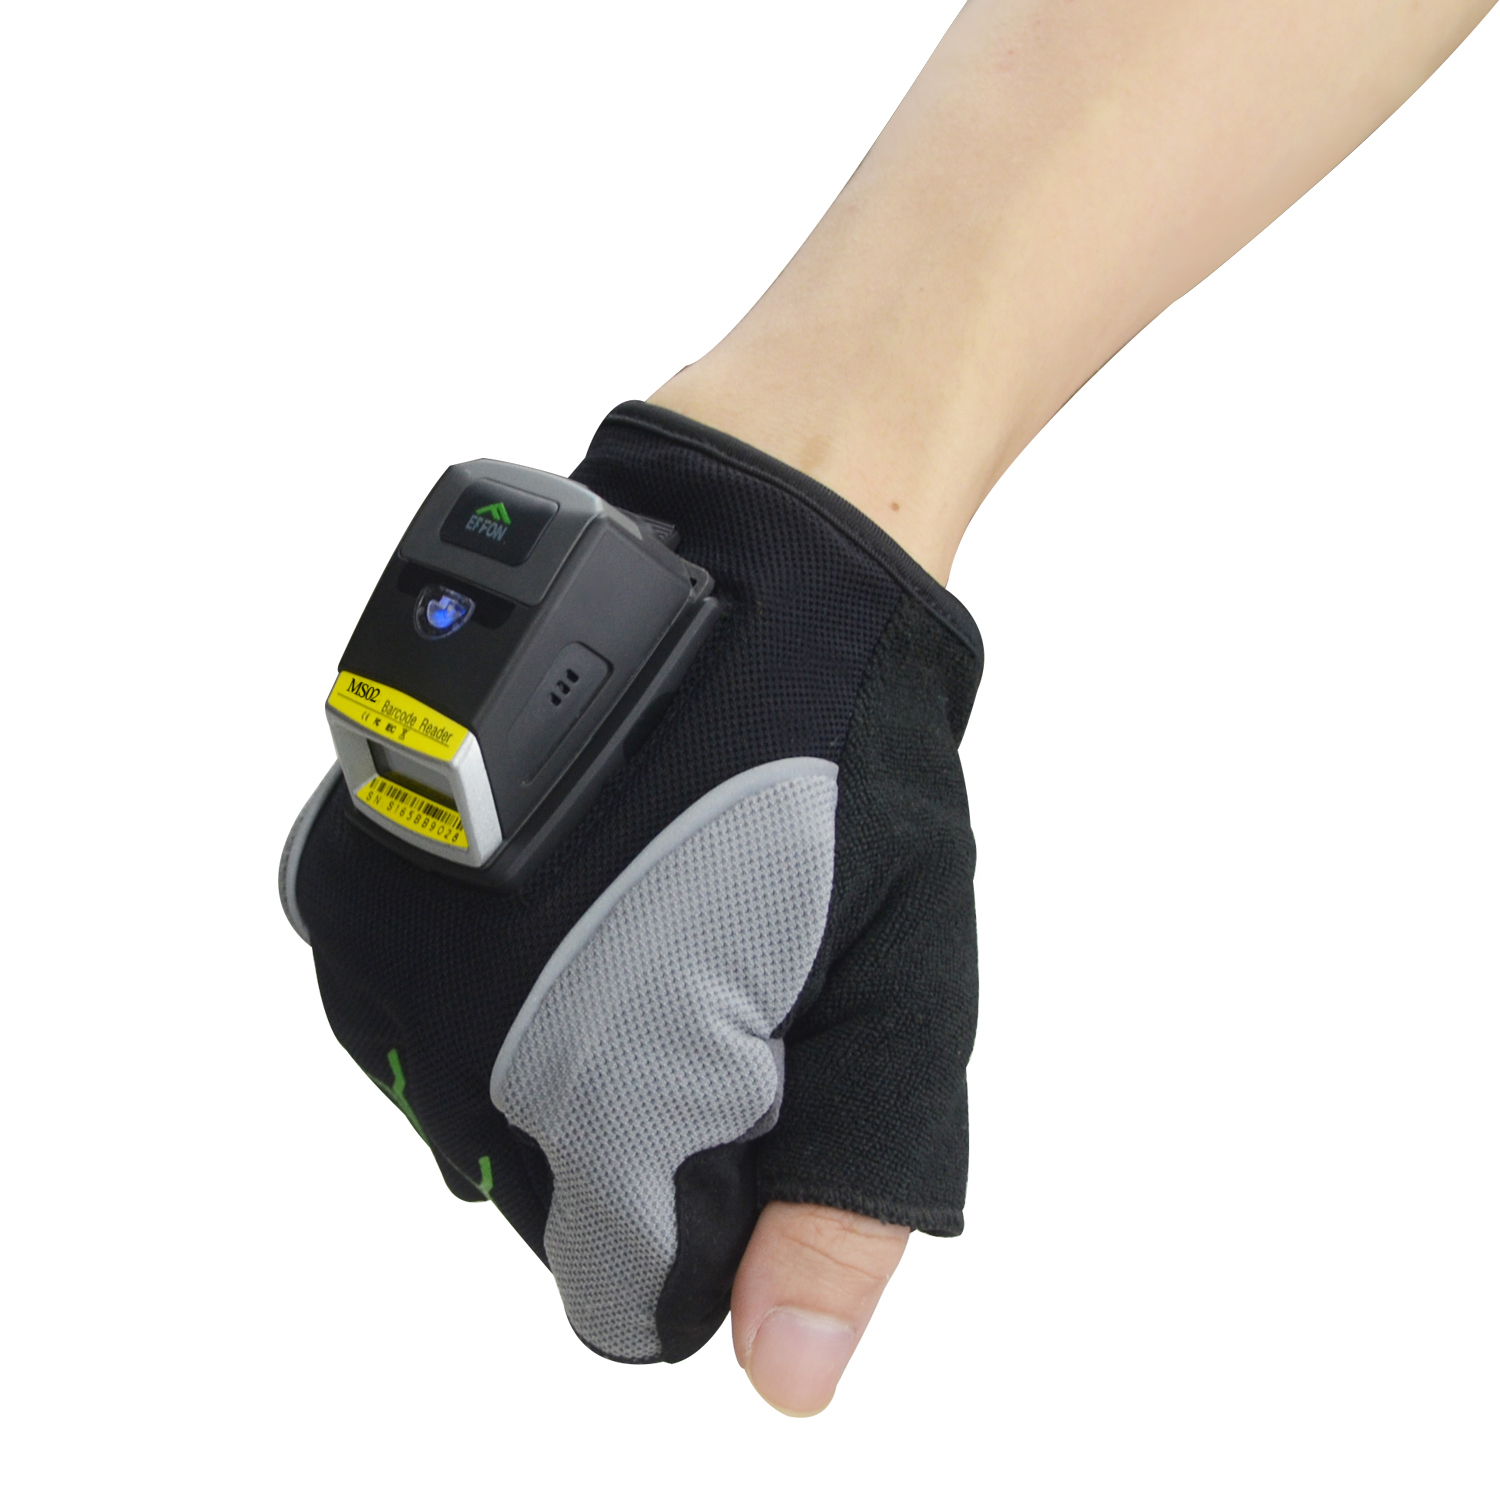
B. Wear the glove scanner on one hand, switch on the scanner by pressing the trigger button using thumb finger;
The scanning is triggered by pressing the button using thumb finger
| Product name | Wearable Ring Barcode Reader Scanner Gloves |
| For scanner Type | NS02 |
| Communication | Bluetooth HID, SPP, BLE |
| Glove Material | Microfiber |
| Glove Model | Right hand (default) |
1. Introduction
Table1.1
| Model | Function and description | Picture | |
| MS02-E2 |
●Industrial Ring type 2D bar code scanner ●Bluetooth HID, SPP, BLE mode, offline data upload feature ●Supports NFC pairing connection ●With vibration, sound prompts ●Zebra SE2707 scanning engine employed (optional) ●Top touch trigger function ●Button life up to 1 million times ●550mAh replaceable rechargeable battery, can work 24 hours a day ●Industrial-grade PC+TPU two-color mold housing ●IP65 rating against dust and water ●2,000 3.28 ft./1m tumbles ●1.5m drop test (200 times) |
| |
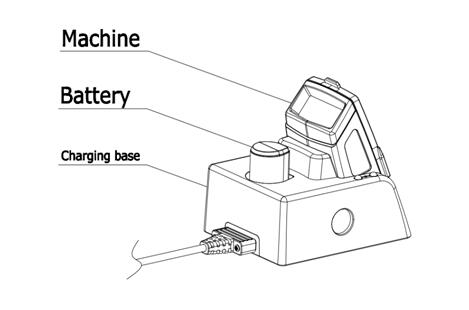
| Charging | ●It can charge both batteries and machines at the same time with BFP1 or BFP2. ●Charging time just for 2 hours.(When the battery capacity is 550mA) | ||
|
| |||
Turn on: At the push of a button, the green light will shinning once time,at the same time the buzzer will ring once, and the device will vibrate keep ashort time(100ms), then the reader is started.
Turn off: After 20 minutes of standby, it will automatically turn off, thegreen indicator light will turn on, the buzzer will sound, and the device willremain vibrating for 0.6 seconds. Then all instructions will stop and thescanner will turn off.
2.2 Buzzer and indicator Light State
Table2.1
| LED light and buzzer status | Description |
| After scanning the barcode, the green light flashes once and the buzzer ring once. | Scanned barcode decoded successfully |
| Green light turns on and off every 1 second | Alert battery low |
| Blue light flashes quickly | The device is in Bluetooth HID mode |
| Blue light flashes slowly | The device is in Bluetooth SPP mode |
| Blue light goes out after Bluetooth pairing | Bluetooth pairing succeeded |
| Red light is always on | The device is charging |
| The red light goes out during charging | Indicates that the device battery is fully charged |
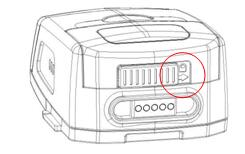
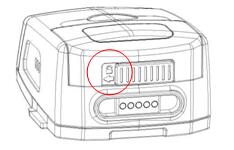
2.3 Battery disassembly
Table 2.2
| | A.Push the push button to the left in the direction of the arrow | B.Keep the push button on the left and pull the battery cover up to open the battery cover and remove the battery. |
| | |
| ⑵Install the battery | A.With the battery electrode facing down and into the battery slot, insert the two buckles on the battery cover into the holes on the top of the machine. | B.Keep the push button to the left, cover the battery cover, and press the battery cover firmly to push the push button back to the right. |
|
|
|
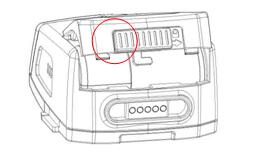
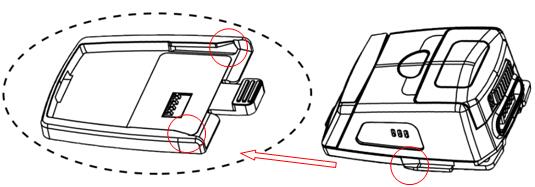
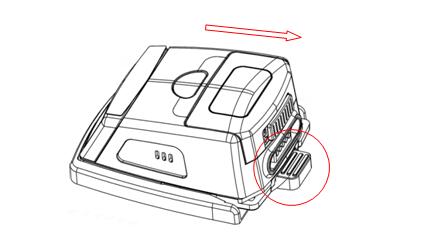
2.4 Machine disassembly
Table 2.3
| ⑴Install the machine | Align the protruding fin buckle on both sides of the machine with the slot on the glove, gently press the machine and push it to the end, the installation is successful. |
| |
| ⑵Remove the machine | Press down the tail buckle, pinch the sides of the machine, and slide it out. |
|
|
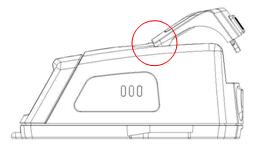
3 Wearing schematic
|
|
Package only included Trigger glove not included NS02 ring scanner and battery charger, Thanks
Related Products

Neck Wrist Lanyard Portable Mini Bluetooth 2D Barcode Scanner
$205.00 $224.00